1. Displays — Using a second monitor or a Projector
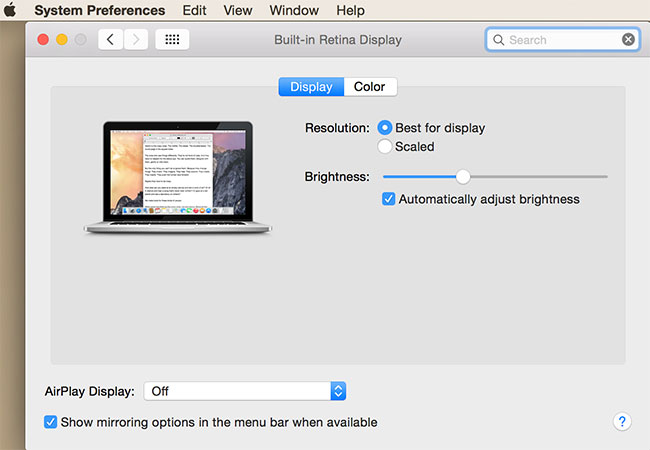
Since Apple introduced AirPlay, they have given the impression that they have virtually dumped displaying your content on a VGA connection such as a projector. Mountain Lion, Mavericks and now Yosemite have seen the disappearance of the Displays Option in the Menu Bar. The 'Detect Displays' option appears to have gone. But has it? When plugging into a VGA projector, both Mavericks and Yosemite only show two resolutions in the 'Scaled Mode' — 800x600 and 1280x1024. So where have the others gone?
|
|
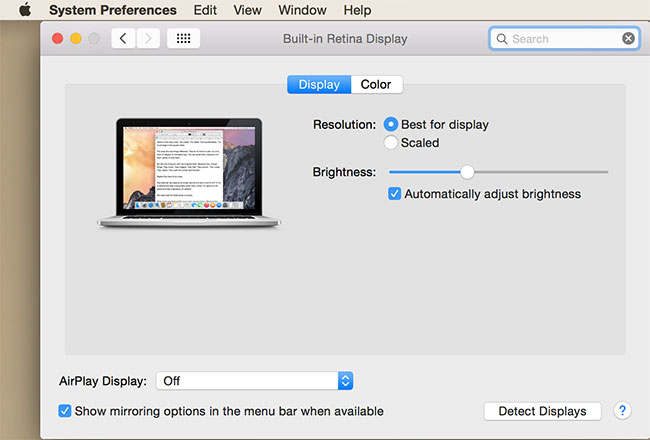
When viewing the Displays System Preference, pressing the option key on the keyboard brings back the 'Detect Displays' option (shown right). Not back in the Menu Bar, but certainly not gone. [The Detect Displays button appears whilst the option key is held.]
|
|
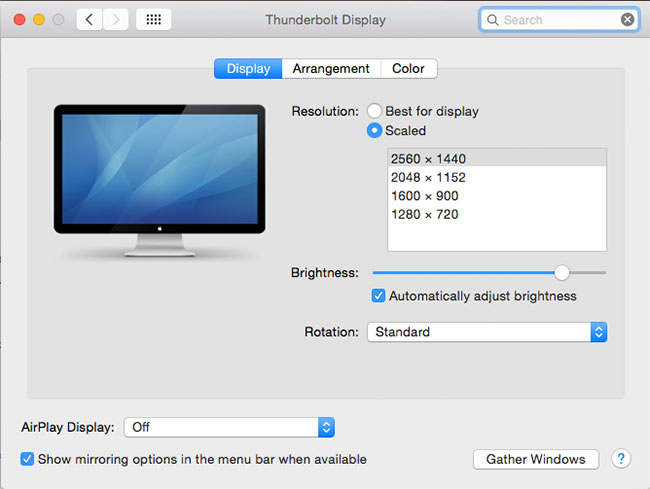
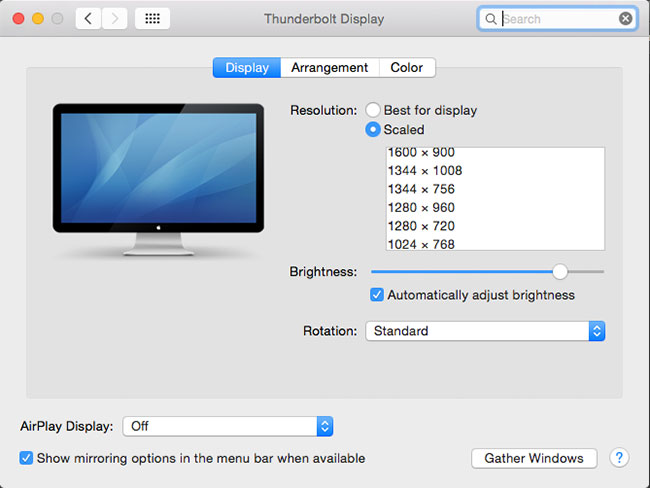
When you click on the Scaled button to change specific Resolutions from 'Best for display', you are presented with just a few possible choices. These are my choices shown with a 27" Apple Thunderbolt Display. A VGA Projector only shows you 800x600 and 1280x1024 — neither worth choosing. But if you press the option key while clicking on the 'Scaled' button, you get all the choices you used to get with Mac OS 10.7! The second picture above shows a sample of a whole bunch more resolution options... [All possible Resolutions are displayed when option-clicking the Scaled button.]
2. Duplicating files in the finder or Objects in Documents
Clicking on any file icon in the Finder and performing a command-d (⌘-D) duplicates that file. But sometimes we just like to drag files from one place to another — and if you want that file to be duplicated rather than moved, just hold down the option key while dragging that file icon.

In this example at left, the picture file 'Time Machine' is dragged across the desktop while holding the option key. This will invoke the file to be copied to its new location and names it TimeMachine 2.
This technique is also used in most programs which deal with objects. For example in Pages, if you option-drag a shape, a copy of that shape is produced!
Option dragging objects in most programs copies the object to its designated location.
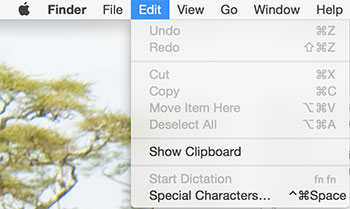
3. Moving Finder Files — Cut and Paste (Yes the Mac does that too)
Another way to move files in the Finder from one folder location to another is to copy the file with a command-c (⌘-C) and instead of pasting the file at it's new location with the standard command-v (⌘-V), you can additionally hold the option key while pasting. This acts as a Cut-and-Paste by moving the file from it's initial location....

|
|
Those who prefer to use menu options rather than keyboard commands can see the Finder-Edit menu changing above when the option key is pressed. The 'Paste' option is changed to 'Move Item Here'. Note the keyboard shortcuts are always shown.
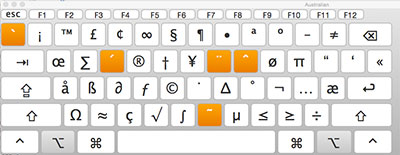
4. Keyboard Characters — typing what you want
Since day 1, Mac OS has provide great support fort typing special characters directly on the keyboard. Typing characters such as bullets (•), accented letters (é, ê), mathematics symbols (≠, ≤, π), en and em dashes (–, —) have always been a breeze.
|

|
The keyboard above on the left shows part of an Apple Keyboard with keys being displayed while holding the option key. The second keyboard shows what keys are available while holding down the shift-option keys together. Note an en-dash (–) is typed by pressing an option-hyphen, and the em-dash (—) is typed by pressing option-shift-hyphen. A bullet is an option-8. Pi is option-p, does not equals is option-=. Is not less than is option-<. Some of the vowel letters are highlighted on the first keyboard above when option is pressed. These create accented characters by typing option-vowel letter, then the letter.
Users should memorise the keys they need or use most. Otherwise you can use the Insert Character option by placing the Character viewer in your menu bar.
Tip: On a MacBook keyboard with a Function key (fn), holding the Function key while pressing the delete key (fn-delete) deletes the character after the cursor, it deletes forward as opposed to the normal delete previous character action.
5. Sound — Input and output
The sound level option in the menu bar is always used to increase or decrease the computer's sound volume (as are the sound keys on the keyboard). By holding the option key and then clicking the sound icon on the menu bar provides easy access to your sound sources — Input and Output.

|

|
While holding the option key and clicking on the sound volume icon, the choices of outputting the computer sound to either the Internal speakers or a choice of a pair of Apple TVs are offered. We also would see any sound input devices such as additional microphones or headsets available here as selectable Input Devices. |
